Q: What is the correct guide rail spacing for my Biesemeyer style fence?
“I’m making my own guide rails, how do I make sure I get the gap just right between my tubing and my angle iron?”
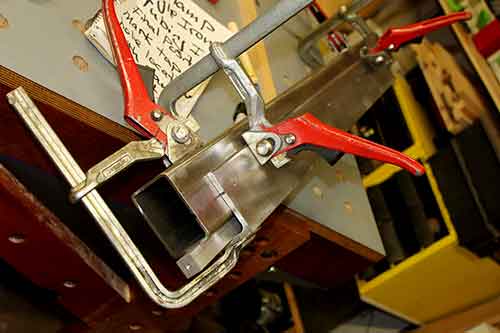
A: You need a minimum of 3/4″ parallel spacing, perfectly even, the entire length of your tubing.
“The key to achieving the correct guide rail spacing for the parallel gap on your Biesemeyer style fence is to make sure you you have a minimum of 3/4″ , perfectly even, the length of the angle iron. I’ve made several guide rails and I like to use a long aluminum bar for my 3/4″ spacer. If you don’t have a 3/4″ bar handy, you can make one out of wood.
You’ll also need spacers to use as lifts. These lift spacers will ensure that the radius inside corner of the angle iron doesn’t interfere with this crucial spacing requirement. I used old wooden handles from foam brushes (dowels) for my lifts.
And yes you can have your parallel gap more than 3/4″ but I don’t know why you would want to. I like to have plenty of angle iron under my tubing, and 3/4″ is the perfect spacing. You just need to make sure that you have a FULL 3/4″ for the entire length of the angle iron.” ~ Allan Little

You’ll note in the diy guide rail detailed steps blog post (40 steps in all) that there are four different times where you will be using your parallel spacing set-up.
STEP 7) To mark the bolt line (no clamping)
STEP 11/12) When you have the angle iron and tubing clamped together and mark through the holes in the angle iron with #7 drill bit onto the tubing
STEP 16) When you first bolt the tubing to the angle iron for initial alignment (not attached to table yet)
STEP 38/39) During final installation to the table.

For this guide rail spacing set up you’ll need these items:
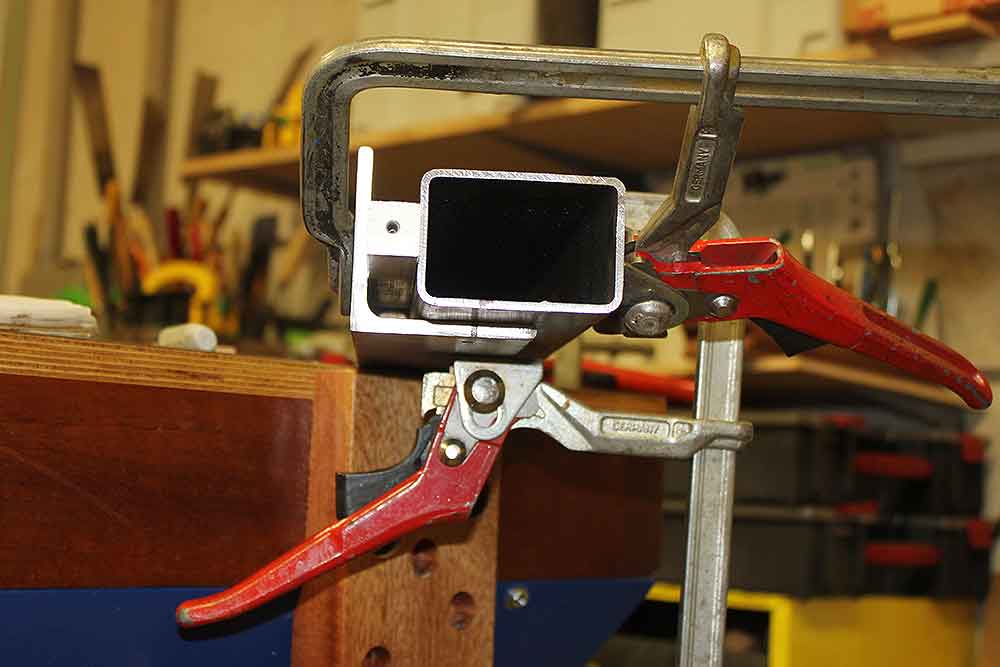
4 clamps (Any clamps will do.
The clamps pictured are my Bessey Rapid Action LC 8’s)
1 bar or a few blocks.
2 wood spacers to use as lifts