“These auxiliary fences I’m making here are every bit as accurate and functional as the Compact versions we were selling.” ~ Allan Little
Click this link to download the Auxiliary Template.pdf
We are happy to offer an affordable and easy solution to having multiple auxiliary fences attached to your Verysupercool Tools machined aluminum extrusion.
It is no longer feasible for us to fabricate and ship auxiliary fences made with Compact by WilsonArt. But this DIY solution offers the best value for our customers.
Whether it’s melamin-coated chipboard or mdf, it’s very stable and the perfect material to make an auxiliary face. You may even have some of this material lying around your shop, if not, your local hardware store will surely have this shelving material in stock. It’s as common as dirt.
The combination of this inexpensive material, coupled with the fact you don’t have to pay any shipping, our customers now have the ability to have multiple auxiliary fences for all their table saw needs.
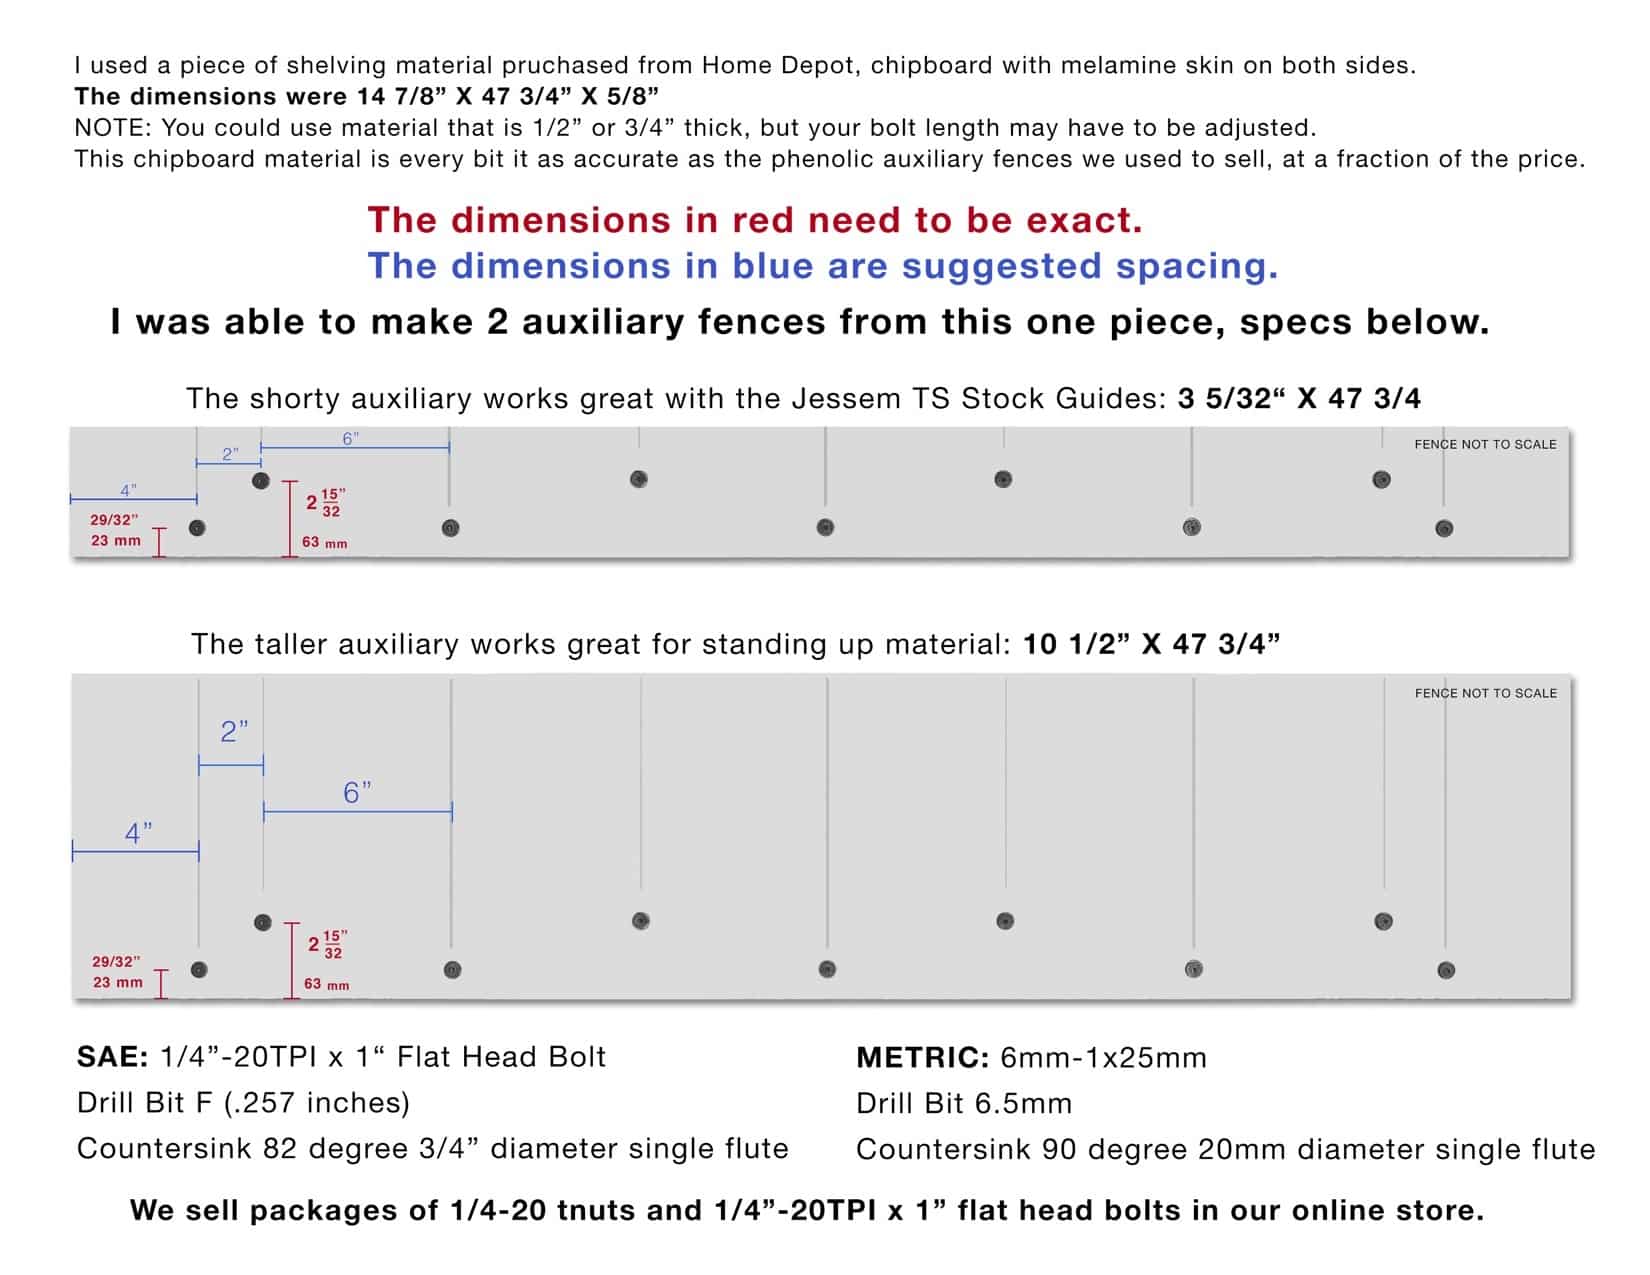
In the video below I used a single piece of shelving material I purchased from Home Depot. Then I drilled the holes using the specs below. Everything is shown in the video.
NOTE: The only reason I marked my holes, and then cut the material, and then marked my holes again was because I wanted the only melamine edge to be up on the large auxiliary fence.
You can make a single auxiliary fence in six simple steps.
1. Get your material
2. Use a pencil and a combination square to mark out your spacing and hole locations.
3. Use an awl to mark the drill locations.
4. Use a small drill bit for the initial drill hole (1/8” works great)
5. Then drill with your F drill bit
6. Countersink your holes and you’re done